
Picasa is a Google’s program. You have an opportunity to download Picasa and exploit it for free to and edit digital photos. This article tells you how to start using Picasa software.
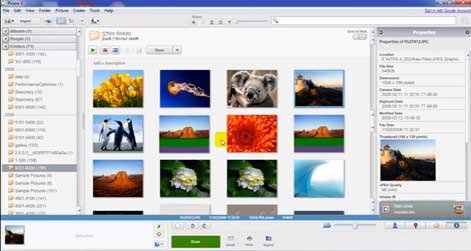
When you open Picasa for the first time, you’ll be able to select the option to scan your hard drive, or just My images, My documents, or Desktop. The program displays your photos in the Library. Perhaps, you will see photos that you have already forgotten, because Picasa makes browsing very simple and convenient. If you have photos outside the My Pictures, My Documents, and Desktop folders, then you can add a new folder manually by clicking on Tools/Manage folders. The program will display your photos.
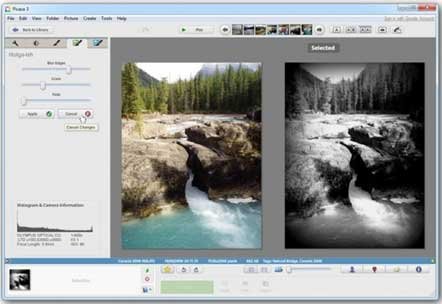
Double-click on the photo to proceed to the editing window. Find out what each button does in the “Normal” edit box.
Short guide:
- The first button is “Crop“. By clicking on this button, you can cut out part of your image, select the size manually, or one of the previously created sizes. Click “Apply” when done.
- “Straighten” button can correct the horizontal position of the landscape. Click on it, and use the grid, and the slider until the image fits into place.
- “Redeye“. If you click on it, Picasa automatically corrects the “red” eyes in your photo and displays them in green squares. If the program has missed someone’s eyes, you can point them at the window of this function, and Picasa will fix them. If the program selects the wrong object with squares, then you can click on this square to turn Picasa off this selection.
- “I’m Feeling Lucky” changes the lighting and color of your photo at the discretion of the program. This button can be useful for changing obscure and dim photos.
- “Auto Contrast” raises the photo contrast to a better level.
- “Auto Color” improves the color of the photo and works well with dim images.
- “Retouch” button can remove traces of dust from the photo, which can help if your lens was dusty. Click the “Retouch” button, and then hover over the cloudy part of the photo, moving the mouse until the spot is removed.
- “Text” can add text to the photo. Click the button, and then point to any place in the photo to start typing. Use the text box that appears on the left to change the font, size, color, and transparency settings for the text.
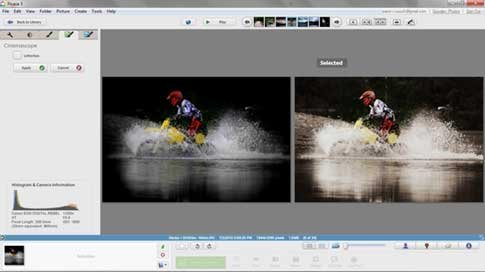
- “Fill Light” can highlight your photo if it’s dark. Slide the slider up and down until the photo is perfectly illuminated.
The info in the “Tuning” tab makes clear how to use the configuration tools:
- The “Fill Light” slider has the same meaning as the last button in the “Basic” edit box. Slide it up and down to highlight the photo. It’s useful when you forget about the outbreak.
- The “Highlights” slider makes the colors of the photo more vivid and open. Exploit when you want to highlight bright places.
- The “Shadows” slider has the opposite effect, compared to the “Highlights” slider. Exploit when you want to add shadows in dark areas of the photo.
- The “Color Temperature” slider changes the “temperature” of your photo. Blue – cold and red – warm. Move the slider to the left if you want to add bluer, and to the right if you want to add red.
- “Neutral Color Picker” removes the hue from the photos. Click on the dropper icon and then on the neutral black, gray or white photo area to change the color.
You can also share edited photos. There are several ways to share photos from Picasa, such as:
“Upload” – to download Picasa Web Albums. This will only work if you have a Picasa account.
“Email” – to forward the photos to friends. You can use the default e-mail program, but it will be more difficult to work with Picasa, or you can use your Gmail account, which will be much easier.
“Print” – to send the photos to your printer. Before printing, you can change the settings.
“Export” – to move the photos to another folder on your computer’s hard drive. This is useful if you want to copy your photos to a USB or CD drive.
“Shop” – to shop online. From sites where you can sell your photos, to professional printing services.
“BlogThis” – to upload your photos to Google Blog, if you have one, along with the message.
“Collage” – to create a collage of the photos you selected. You can choose the grid settings and the size of your collage. When you’re done, save it and share it with your friends!
“Video” – to create a video from the selected photos. You can select the audio track to use along with the video, photo transition style and the size of your video. By clicking on “Slide” from the top, you can add text to your video. When finished, you can upload the video to YouTube if you have a YouTube account.
“Geotag” – to add the location to the photos using Google Earth. To do this, you will need Google Earth installed on your computer. Wait until Google Earth opens, then move the pointer to the desired position on the globe, and click “Geotag” in the lower right corner of the screen.
There are also a few tips for using Picasa:
- a green safety pin near the photo tray can hold photos in the tray, even if you desire to add other folders;
- the red circle, next to the photo tray, at one time, can completely clear the tray;
- increase the image, at least 100%, when you work with red eyes;
- you can use the “Undo” and “Redo” buttons and the lower part of the basic section, settings, and effects if you don’t like the changes made.